813.406.4448
Contact Us
Book an Appointment
Home
About
Dr. Ambay
Meet The Team at Ambay Plastic Surgery
Our Facility
In the Media
Video Library
Procedures
Breast Surgery
Breast Augmentation
Breast Lift
Breast Reconstruction
Breast Reduction
Mommy Makeover
Breast Fat Transfer
Facial Surgery
Brow Lift
Facial Implants
Cheeks Implants
Chin Implants
Jawline Implants
Temporal Implant Surgery
Eyelid Lift
Facelift
Deep Plane Facelift
Mini Facelift
Necklift
Face Fat Transfer
Rhinoplasty
Body Contouring
Tummy Tuck
Thigh Lift
Body Lift
Liposuction
Brazilian Butt Lift
Arm Lift
Mommy Makeover
Labiaplasty
Body Fat Transfer
Hair Restoration
Hair Loss Treatment
Hair Transplant
Male
Hair Loss Treatment
Hair Transplant
Male Breast Reduction
CO2 Laser Resurfacing
Non-Surgical Procedures
Gallery
Testimonials
Resources
Blog
Financing
Patient Forms
Specials
Virtual Consultation
Contact Us
Book An Appointment
Fat Transfer Before and After
Contact Us
Gallery
Meet Dr. Ambay
Home
/
Gallery
/
Face
/
Fat Transfer
/
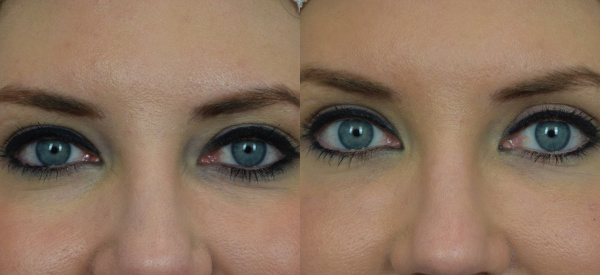
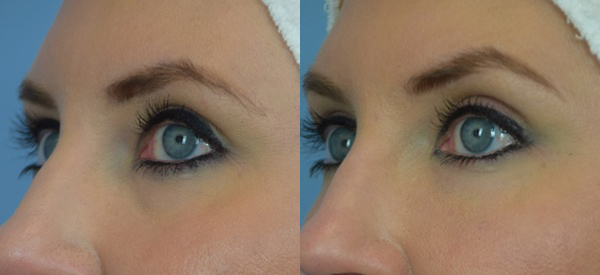
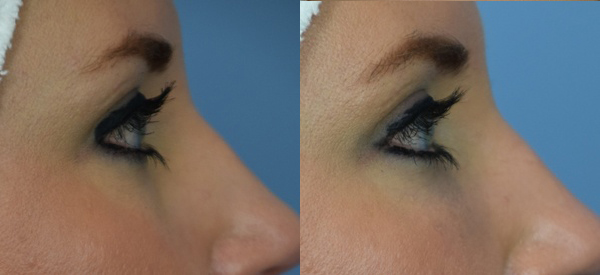
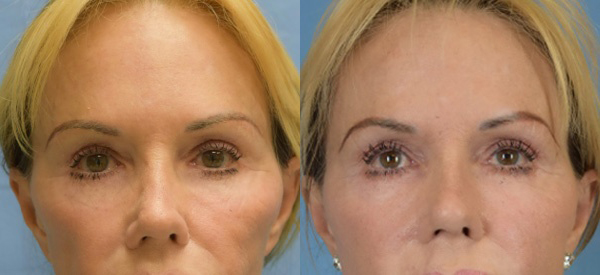
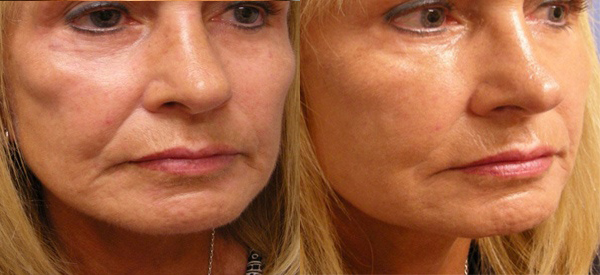
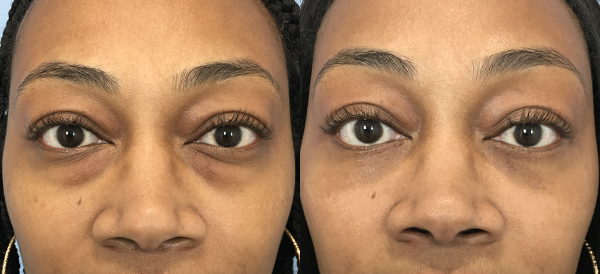
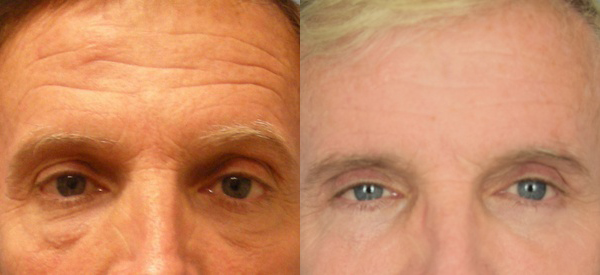
Fat Transfer – Patient #3
Back to Main Gallery
PREVIOUS
PATIENT
NEXT
PATIENT
Fat Transfer Patient
More on Fat Transfer
Contact Us
Full Name
*
Phone Number
*
Email Address
*
Message
Submit
×
Please verify before submitting.